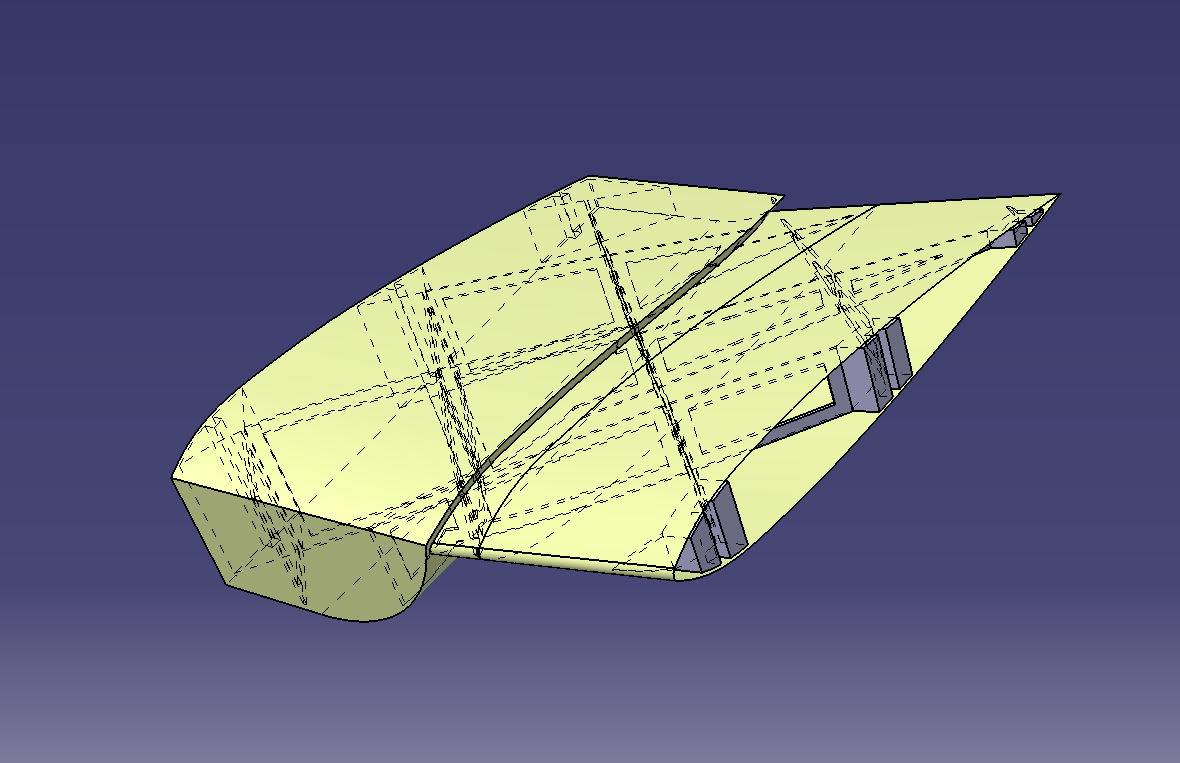
Hi, today I'll be showing the final version of the wings along with their connection point to the fuselage. To build the model in CATIA, I used a similar approach to the previous wing design and created the interior structure by utilizing a Boolean operator to cut out a solid lattice mesh within the wing skin before making the holes and male-female connections. The only difference was that I also did this for the middle section of the fuselage where the wing joins into the main body, thus creating one whole part that will eventually click into the rest of the airplane. Here are some images of the entire file:
After, I separated the wing into separate printing files at the connection points seen above (the thicker areas), thereby creating six different components (plus the two wing-caps at the end). Here's the split part most to the left:
Notice how in the last photo the wing is cut vertically on the y-z axis with respect to the world coordinates. This is the one big change I had to make from the previous wing design, where the wing was cut with respect to the normal of the exterior skin, since the 3D printer splicing program (Simplify 3D) would keep messing up with the normal split and not print it properly. By implementing this change, each wing component would be printed on a slight angle rather than straight up, but this solved the issue and provided me with a clean part in the end. Next up are the last two left wing pieces, including the one that fits into the fuselage:
As a side-note, each male connector was 1.3mm thick and 2mm long, while the females were 1.8mm thick and 2mm deep. For the right wing, I simply mirrored the above parts into their own separate files, and begun printing them all together. Although there were initially some mistakes in the process:
Eventually it got it right and I was able to glue together the wing:
To connect the two fuselage pieces shown above, I had to print three rod pieces to fit into the mesh holes, which would ensure structural stability.
One other problem I ran into after printing this part was that there was not a lot of plastic covering the section where the wing intersected into the fuselage itself; this was remedied by applying some hot glue to close up the hole. The final product is about 90 cm long and weighs in at 138 g (a result I am very happy with)! Next I will probably begin working on the front portion of the fuselage, where the motor and battery will be held, along with an enclosure for the 3D printer so it doesn't get super dusty while working in the garage :) I'll be posting about that within the next few days or so.


No comments:
Post a Comment